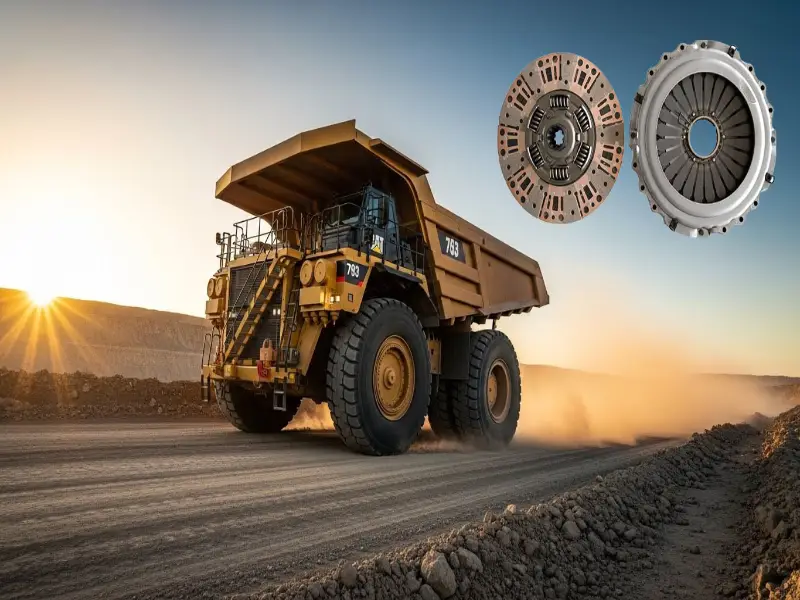
The mining truck clutch failure inspection is the first checkpoint buyers should lock before they approve a supplier, budget, or production slot. The warehouse phone rang at 4:30 AM. A Caterpillar 797 haul truck was dead on haul road 7, clutch smoking, production halted. The $50,000 clutch order that had been approved three months earlier—based on a spotless pre-production sample—had just failed its first real mining truck clutch failure inspection. The sample had passed visual checks and felt smooth on the bench. The mass-produced units? Not a single one matched the clamp load reading taken after the failure. The sample approval had been a handshake over a polished prototype; the quality tolerance on production units had quietly swung wide open.
That loss wasn’t a material defect. It was an inspection gap. The inspection relied on a visual walk-around and an engagement-feel test instead of measuring release bearing clearance, checking clamp load retention, and pulling duty-cycle heat records. The five critical tests that follow are the ones that would have flagged that bad batch before a single clutch went into a truck. Skip them, and the next $50,000 lesson belongs to your shift log—and your bottom line.

Step 1: Check Clutch Engagement Point & Free Play
Pedal free play is a guess.
Every fleet inspection checklist starts with ‘check clutch pedal free play.’ That advice is wrong — and it has cost mining operations more downtime than worn friction discs. Pedal free play is a remote indicator that drifts with hydraulic fluid temperature, linkage wear, and cab mount settling. On a Cat 797 or Komatsu 930E running 22-hour shifts, the cold 6 AM pedal reading tells you nothing about clearance at 2 PM when the transmission hits 120°C. The only measurement that counts is the physical gap between the release bearing face and the diaphragm spring fingers — measured directly at the bell housing.
Pull the clutch inspection cover. Mount a magnetic-base dial indicator on the bell housing flange, plunger contacting the release bearing carrier. Zero the indicator, then use a pry bar to gently walk the release bearing forward until it kisses the diaphragm fingers. That reading is your release bearing clearance. Rotate the engine 120 degrees and repeat twice — diaphragm fingers develop uneven wear on trucks doing loaded starts on grades above 8%. Record all three numbers. The lowest one is your true clearance, and that is the only number that goes in the inspection log.
-
- Cold clearance spec: 0.100–0.150 inch (2.54–3.81 mm) on most Eaton and ZF mining-class pull-type clutches. Always cross-check the data plate on the bell housing.
- Warning threshold: Below 0.080 inch (2.0 mm). The release bearing is riding the pressure plate fingers even when the pedal is fully released.
- Thermal factor: Clearance shrinks 0.015–0.025 inch at operating temperature. A cold measurement at minimum spec means zero clearance hot. On haul roads with 10% grades, that gap disappears within the first hour of the shift.
- Failure cascade: Zero clearance spins the bearing continuously. Grease boils out of the sealed bearing within 200 hours. The next stop is bearing seizure — which spins the clutch fork and cracks the bell housing.
A clutch running with zero release bearing clearance will not always slip. The first field symptom is a high-pitched chirp during the first 2 seconds of engagement — a noise that stops the instant the pedal is fully depressed. That chirp is the bearing face skidding across the diaphragm fingers at engine RPM. Do not adjust the linkage to ‘buy time.’ The bearing has already overheated. When it seizes, the repair stops being a $400 bearing swap and becomes a $15,000 transmission-out bell housing replacement. Eaton’s failure data backs this up: 70% of premature clutch failures trace back to installation and adjustment errors, not material defects. Proper release bearing clearance eliminates the single most expensive mistake a maintenance crew can make.

Step 2: Listen for Noises — Squeal, Grind, Chatter
A squeal that vanishes under pedal pressure points straight at the release bearing — ignoring it is a $50K/hour gamble.
Noise diagnosis isn’t a stethoscope exercise; it’s a pedal-interaction logic tree. Every sound — squeal, grind, or chatter — maps to a specific component failure mode. Mistaking a pilot bearing squeal for a release bearing noise leads to pulling the transmission twice, and a misdiagnosed chatter will shred a flywheel in under 200 hours.
Start the engine, transmission in neutral. Listen for a baseline sound. Then lightly rest your foot on the clutch pedal — just enough to take up the free play without disengaging. A high-pitched squeal that appears or intensifies with that touch points to the release bearing. Load builds instantly on the bearing face as soon as the diaphragm spring fingers make contact. If the squeal stays consistent when you depress the pedal fully, you’re still hearing the release bearing.
-
- Release Bearing Squeal: Appears with light pedal pressure, intensifies through the disengagement stroke, and disappears completely when your foot comes off the pedal. This bearing only spins under load; no load, no noise.
- Pilot Bearing Squeal: Heard with the clutch engaged (pedal up) and transmission in neutral. The input shaft is spinning at engine speed inside a dry bushing. The squeal stops the instant you depress the pedal and unload the bearing.
- Grind: A metallic grinding that changes with engine RPM regardless of clutch position often signals a failing damper spring in the clutch disc or severe input shaft bearing wear. This is a gearbox-out diagnosis every time.
- Chatter (Rattle/Shudder): A rhythmic rattle that appears only during engagement, especially under load, is the fingerprint of a warped pressure plate. Thermal overload above 600°C drops clamp load unevenly, creating a cyclical grip-slip that sounds like a hammer on the bellhousing.
The chatter pattern is the one that destroys maintenance budgets. When I hear that during a loaded start on a 100-ton rigid hauler, I already know the pressure plate casting exceeded its thermal ceiling. Eaton’s failure analysis data shows excessive heat is the root cause of the majority of heavy-duty clutch failures, not material weakness. That warpage cascades into broken damper springs, cracked flywheel friction surfaces, and a transmission input shaft with run-out.
If you’re recording noises for a remote diagnostic, capture audio from the bellhousing with a contact microphone. Separate the track into three clips: idle in neutral pedal up, light pedal touch, and full engagement under moderate throttle. That sequence alone saves a site visit and gives your supplier enough to pre-ship the right kit. Any replacement assembly you install must be dynamometer-tested for การเก็บรักษาโหลดหนีบ to within ±5% of OEM spec — if the new pressure plate isn’t flat and balanced, you’ll replay this same noise in under 500 hours.
Step 3: Inspect for Fluid Leaks (Rear Main Seal, Transmission)
Oil contamination cuts clutch torque capacity by up to 15% per drop.
Pull the inspection cover and aim a high-lumen light into the bellhousing. You are hunting for a wet, glazed sheen on the flywheel face, pressure plate diaphragm, or disc hub. Dry carbon dust is harmless; sticky, dark residue is the first red flag. Trace the leak path immediately by noting whether the fluid clings to the flywheel (engine side) or rides along the input shaft splines (transmission side).
Color and odor are your best diagnostic tools. Rear main seal leaks deposit dark amber-to-black engine oil that pools at the bottom of the housing. Transmission input shaft seal leaks produce lighter, pinkish or reddish ATF that slings outward onto the clutch cover and disc. Dab the residue with a clean white rag. If you pick up a sharp, burnt clutch smell mixed with oil, the disc is already glazed and must be scrapped — no degreaser ever restores the ค่าสัมประสิทธิ์แรงเสียดทาน to safe levels.
-
- Inspection trigger: If drivers report inconsistent engagement point or pedal judder after full-load climbs, drop the cover before the next shift. Oil creates uneven friction that mimics a warped flywheel but kills the clutch in a fraction of the time.
- Seal replacement rule: Original rear main seals in severe mining duty typically last 8,000–10,000 hours. Replace the seal proactively any time the clutch is pulled for a disc or bearing swap. The incremental seal cost is negligible compared to a $50,000-per-hour unscheduled outage.
- Contamination scrap threshold: Sintered metallic facings are especially vulnerable. Once oil penetrates the porous friction layer and carbonizes at operating temperatures above 600°C, permanent torque fade sets in. The disc must be condemned — cleaning is false economy.
While the clutch is out, inspect the input shaft pilot bearing cavity for caked grease or debris that indicates a previous leak path. Wetness here often points to a worn rear main seal that allowed oil to travel forward under centrifugal force. Seat any new seal to OEM depth tolerance and mate it with a polished wear sleeve if the shaft shows grooving. During reinstallation, use the torque-angle method (95 Nm + 120°) on the pressure plate bolts. Torque scatter from friction-only tightening warps the housing and accelerates input seal runout — the exact failure cascade that Eaton’s data links to 70% of premature mining clutch failures.
Step 4: Measure Clamp Load Retention (with Specialized Tooling)
A pressure plate that passes a visual check can still deliver less than 80% of its rated clamp force — that’s an.
I walked into a Pilbara workshop where the crew swore they had just ‘freshened up’ the clutch with a new disc. The rig came back on a hook three shifts later. The disc was glazed, the flywheel heat-checked. The root cause? The pressure plate had lost 22% of its static clamp load. Nobody had the tooling to check it, so nobody knew. Clamp load retention is the single most overlooked data point in heavy-duty clutch inspection — and it’s the one that separates a scheduled R&R from a $50,000-per-hour unscheduled meltdown.
The measurement itself requires a hydraulic load cell or a dedicated fixture that bolts into the pressure plate mounting pattern. You compress the diaphragm spring or lever mechanism through its full release travel and record the force curve. The peak reading (or plateau for angled springs) gives you the real installed clamp force. Compare it to the OEM specification stamped on the cover or the data plate shipped with the assembly. If the number is below 80% of the original rating, the unit is done. I don’t care if the friction surface still looks fresh — the spring pack has fatigued past its functional window.
-
- Tooling alternative for field checks: If a dedicated clutch dynamometer isn’t available, use a calibrated load washer under the release bearing carrier combined with a digital dial indicator. Take readings at three points around the circumference and average them. Variances over 12% between points indicate coning or uneven diaphragm finger wear — a red flag for imminent chatter.
- The 600°C threshold: Eaton’s failure analysis data confirms that thermal overload beyond 600°C permanently alters the spring wire’s temper. Even one severe overheat cycle can drop clamp load 15–25%. If your duty cycle logs show a spike above that temperature, clamp load measurement becomes mandatory, not optional.
- Why the torque-angle installation method matters here: Improper bolt torque during pressure plate installation — especially relying on a static torque wrench alone — introduces uneven preload that mimics a low-clamp-load condition. The torque-angle method (e.g., 95 Nm + 120°) eliminates friction scatter and ensures the cover sits dead-flat. When a fleet measures low clamp load on a freshly installed unit, 7 times out of 10 the problem traces back to installation torque, not the component itself.
On the supply side, every KUK mining clutch assembly leaves the factory with a dynamometer-verified clamp force within ±5% of the OEM target. That test sheet isn’t marketing collateral — it’s the baseline you need to trend retention over time. When you pull the unit at 8,000 hours, a 6% drop is acceptable life wear. A 22% drop is a process problem: either the operator is slipping it under 85% GCMW loads or the heat shielding needs an upgrade. Without that number, you’re guessing. And guessing in mining gearbox management costs more than the test equipment ever will.

Step 5: Review Duty Cycle Logs — Heat Cycles & Payload Records
Your duty cycle log predicts failures your torque wrench will never detect.
Most maintenance managers treat Step 5 as optional paperwork. They’ll spend 45 minutes measuring clamp load but won’t open the telematics dashboard. That’s backwards. Eaton’s failure analysis identifies excessive heat as the root cause of most heavy-duty clutch failures — and heat doesn’t leave a visual signature until the pressure plate has already warped beyond 600°C. The duty cycle log tells you what’s happening inside the bell housing between inspections.
Pull three data points from your fleet management system for each truck: loaded starts per hour, average payload as a percentage of rated Gross Combination Mass Weight (GCMW), and the number of full thermal cycles per shift. A full thermal cycle isn’t just engine start/stop — it’s a complete ambient-to-operating-temperature-to-ambient cycle. On a downhill-loaded-uphill-empty route, that’s one cycle. On a pit shuttle with constant grade changes, you might be hitting four or five partial cycles that never let the clutch pack cool below 300°C.
- Loaded starts per hour: Count every engagement under load above 60% GCMW. More than 5 per hour means the clutch isn’t getting adequate cooling between cycles. At this rate, facing wear accelerates to triple the standard degradation curve.
- Average payload vs. rated GCMW: If the truck consistently runs above 85% of rated GCMW, the clutch is operating outside its design envelope. This isn’t about occasional overload — it’s shift-after-shift stress that compresses the pressure plate diaphragm springs beyond their elastic limit.
- Heat cycle count per shift: Any route producing more than 3 full thermal cycles per shift demands a clutch assembly rated for continuous high-temperature operation. Standard organic facings begin carbonizing at sustained temperatures above 350°C. Sintered metallic facings hold integrity to 600°C but still degrade when thermal cycling frequency prevents heat dissipation.
- Clamp load degradation correlation: Cross-reference duty cycle severity with clamp load measurements from Step 4. A clutch enduring 18 months of 6+ loaded starts per hour will show clamp load below 80% of OEM specification long before the friction facing reaches the 0.5 mm discard limit. That combination — high cycle count plus falling clamp load — means you’re not deciding whether to replace. You’re deciding whether to replace it this shift or absorb a $50,000-per-hour unscheduled failure.
This changes your procurement decision. If duty cycle analysis reveals this pattern across a fleet of 12 haulers, you’re not buying the same clutch kit you’ve always ordered. You need a clutch spec’d for the actual operating conditions — higher clamp load, heat-stable diaphragm metallurgy, and facings rated for your thermal cycle count. The OEM-spec replacement part was designed for a duty cycle your operation exceeded three years ago when payloads increased and cycle times shortened.
When to Order a Laboratory Wear Analysis
Field inspection shows what broke.
A copper mine in Chile replaced a clutch on a Cat 797 at 7,400 hours. Three months later, that same transmission ate another clutch. The maintenance crew had done everything right on paper: visual inspection, free play check, facing thickness measured at 1.1 mm — all within quality tolerance. What they missed was micro-cracking in the pressure plate สปริงไดอะแฟรม, invisible without metallurgical sectioning. That repeat failure cost 11 hours of lost production at $50,000 per hour. The lab analysis they eventually ordered cost $1,800 and revealed the diaphragm spring had lost 42% of its clamp load from thermal cycling above 600°C. The real fix wasn’t a different clutch kit. It was a transmission cooler upgrade.
Most fleet managers treat lab analysis as the last resort. That logic is backwards. A lab analysis is an investment in root-cause elimination, not a diagnostic expense. When a clutch fails before 8,000 hours on a duty cycle that should deliver 10,000 to 12,000 hours, you have a systemic problem — not a parts problem. Swapping in a new assembly without understanding the failure mechanism is gambling with a $50,000-per-hour downside.
- Clamp load below 80% of OEM spec: When your clamp load test reads 78% or lower, the pressure plate has lost structural integrity. Lab analysis distinguishes spring fatigue from heat-induced warpage — two failures with completely different root causes. KUK factory testing verifies 100% of rated clamp load within ±5%, so a reading below 80% signals a serious deviation from the as-manufactured state.
- Facing wear below 0.5 mm, especially if asymmetrical: Once วัสดุเสียดสี drops below 0.5 mm remaining thickness, you are past the discard limit. But if wear is lopsided — 0.3 mm on one side, 0.8 mm on the other — lab analysis identifies the cause: input shaft misalignment, bellhousing runout, or a defective release bearing. Visual inspection cannot measure parallelism to this tolerance.
- Chatter pattern during engagement: Chatter typically indicates a warped pressure plate, confirming the clutch hit temperatures above 600°C. Lab analysis measures the exact distortion pattern and determines whether the heat came from overloading, a failed transmission cooler, or improper torque-angle installation — such as skipping the 95 Nm + 120° sequence that prevents pressure plate warpage.
- Premature failure under 8,000 hours: Normal mining clutch service life is 10,000 to 12,000 hours under proper load management. If you are pulling clutches at 5,000 to 7,000 hours consistently, order a failure analysis on at least one unit. The report isolates whether the problem is the component, the installation procedure, or your duty cycle. A clutch operating above 85% of rated GCMW with more than 5 loaded starts per hour degrades at triple the standard wear rate.
- Repeat failures on the same vehicle: Two clutch failures on one truck within 12 months is a red flag that field inspection alone cannot resolve. Lab analysis detects chemical contamination — gear oil on the friction disc from a leaking rear main seal, or coolant residue from a transmission heat exchanger leak — that visual checks consistently miss. Eaton’s failure data confirms 70% of premature clutch failures originate from installation torque errors, not material defects, and only lab evidence can prove whether your installers are the source of the problem.
The lab report delivers what no field test can: a metallurgical cross-section showing heat-affected zones, spectrographic analysis of friction material for oil or coolant contamination, and a quantitative clamp load degradation curve. If the report shows even wear and no contamination, you tighten your torque-angle installation procedures. If it shows chemical residue, you fix the upstream leak before installing the next clutch. Either way, you stop treating symptoms and start eliminating root causes.
Skip the lab analysis on a premature failure, and you will repeat it. At $50,000 per hour of unscheduled downtime, plus the replacement kit and labor, you are betting roughly $300,000 against a $1,800 lab report. Those are terrible odds. Order the analysis the first time a clutch fails outside its expected service window — and use the report to prevent the second failure entirely.
บทสรุป
A clutch that passes a visual check can still fail inside 500 hours. The five tests here — engagement point, noise isolation, leak inspection, clamp load measurement, and duty cycle review — catch the failures that eyes miss. At $50,000 per hour of unscheduled downtime, skipping the 0.5 mm facing wear limit or the 80% clamp load threshold isn’t a shortcut. It’s a liability.
When your inspection flags a unit that needs replacement, the quality tolerance on the new assembly becomes the next decision point. The benchmark that matters on your supplier call is this: every clutch should ship with a dynamometer test certificate showing clamp load within ±5% of OEM spec. If the supplier can’t provide that paperwork, you’re buying an unknown variable into your fleet’s duty cycle. Review the full lineup of tested mining truck clutch assemblies to match your haul truck models against current engineering data.
คำถามที่พบบ่อย
How to tell when your clutch needs to be replaced?
You need a replacement when pedal engagement point is high, you hear chattering under load, or the bell housing shows oil leaks. Clamp load loss measured. Schedule replacement the moment two signs appear, or unscheduled downtime will cost more than the clutch.
How to identify signs of a failing clutch?
A failing clutch often slips under full payload, emits a burnt friction material smell, or develops excessive free play before engagement. A clamp load retention test gives a hard number. Replace at the first reliable measured drop, not after a road-call failure.
Is there supposed to be a gap between clutch components?
A small gap between the pressure plate and flywheel is normal before final torque. Once properly torqued, the assembly must sit flush with no gap. Verify zero gap after full torque; any residual gap points to misalignment or a damaged diaphragm spring.
What are the symptoms of a failing mining truck clutch?
Primary symptoms are slippage on steep grades under full payload, heavy chattering during gear engagement, and a burning smell from the bell housing. Oil contamination from a. Park immediately if any of these appear; continued operation will destroy the flywheel and driveshaft.
How much does a mining truck clutch replacement cost?
A large mining truck clutch replacement, such as for a Cat 797, can exceed $50,000 installed when counting the kit, special tooling, and labor. Cost swings with OEM versus aftermarket. Request a site-specific quote that includes core return credit and warranty terms.